Showing posts with label Projects and Crafts. Show all posts

Friday, February 20, 2015

Lately....

So I've been a very bad blogger lately. I know it. I guess I don't have much interesting going on at the moment. =) Or the interesting things is the stuff I'd rather not post about. Although I don't like to be a fake "everything is awesome always!" person, I also don't like to post about sad things, so I think that's taken the wind out of my blogging sails the past couple weeks - that and laziness. =)

Things I have been doing:
  • I've somehow read over 25 books already this year. I've been doing a lot of reviews for authors that don't require posting to a blog, which is nice. I don't mind putting reviews here... but when I don't have a lot of other content it turns into a book-only blog. If you're interested in seeing some of my other reviews, you can follow me on Goodreads or the Little Sprout Facebook page to see those.
  • I've been collecting supplies to make these Survival Candles. I think they will be fun to make with Malachi. I had to get the supplies, PLUS I realized I don't have a metal bowl to use as a double boiler, so I found one for less than $2 at the Goodwill! Yay me!
  • I have also been researching supplies for homemade soap, which was one of my 2015 Goals this year. I've been searching for a cheap immersion blender at Goodwill also, but unfortunately, no luck so far. I could buy one from Walmart, but what if I only do it once?? Then it's ruined for using in real food and I'll have to throw it away.....
Earlier this month, I spent the day with Malachi at his school for his 100th day of school activities and parade. With all the disappointments of early in the school year it was kind of good to see we made it to a milestone!!


We've also had some crazy nice weather here in the PNW - earlier this week it was up in the lower-60s! We lucked out that Malachi's mid-winter break fell on a couple of those days. We set up a playdate with a friend one day and went to the park the next!


Okay, well that is all for now. Now I have to get the little one to nap before I head off to work this afternoon!


Saturday, October 11, 2014

Projects, Cleaning and Pinterest

I have been making an attempt to actually use some of my Pinterest pins. There are SO many - does anyone else ever feel overwhelmed by the gazillions of ideas out there? Truth is, I could probably live to a hundred and not use all my pins, but that doesn't seem to keep me from finding more!

One I decided a couple months ago that I was going to do was to make a pumpkin out of canning rings for Fall. Check! Done!

Cute right? This one is sitting next to my TV in the living room, but I made another one with the wide mouth lids for my dining room table. LOVE!

On a more unpleasant note, I ended up with an unexpected day off from work today. Malachi got sick last night.... very sick... several times. Very strange because there was no fever and he seemed almost normal today, but last night was not fun. I  washed A LOT of laundry today, sheets, mattress covers (he started in my bed and moved to his own.....) pillow cases, pajamas... you get the picture. So I decided to hunt down one of my pins buried in a Cleaning/Household Ideas board for washing pillows (I had two different methods pinned, of course, so I picked the simplest one). Amazing!

This is seriously TMI, but I couldn't believe the difference. The original blogger suggested doing this every 2-3 months - I just might had to attempt that after seeing these results. These are my pillows.

Kind of incredible the difference right? I'm looking forward to sleeping on these pillows tonight. Malachi's got done today too, but I'm going to do my husband's and any other pillows I can find sometime this week.

And lastly... I have about a MILLION recipes pinned. Many, many of them are pumpkin related. I could obviously make these any time of the year, but for some reason I can only do it when it's cold outside. =) Tonight I made these copycat Starbucks pumpkin scones....

Granted, mine do not have the yummy frosting on them yet (although that was also provided in the recipe), but they are still super yummy. I think if I make them again (or I should say when) I will definitely put more spices than called for in them, but other than that they definitely satisfied my pumpkin craving for the day. 

I felt like a accomplished a lot today AND marked a few things off my Pinterest To-Do list as well!


Monday, October 6, 2014

Smooth Mornings

Who doesn't want their mornings to be as simple as possible? Probably everyone, but it's especially nice for people like me who are not morning people at all. If it were up to me, I'd probably lay around it bed until 10am everyday (maybe its a good thing its not up to me!) When I actually DO make it out of bed (at 7:30 if I'm lucky, not 10), I'm really not too awake for awhile.... and if I worked the night before until 11:30pm... I'm probably really not with it.

Sooo... I've tried to make our mornings to school as easy as possible. I make Malachi's lunch the night before and stick the whole packed thing in the refrigerator. The only thing I add is a frozen tube of yogurt as we walk out the door (amazingly I've never forgotten this).

One of my favorite time savers was part of a project I started back before summer ended. I wasn't quite sure how I was going to do it or if it was really going to be worth it, but it turned out great! (I originally got this idea from TheGunnySack blog)

I had purchased this 6 cubbie hanging shelf at Target for about $6.99, I think. They had a nicer, sturdier looking one, but it cost more, so I didn't get it. I wasn't sure if I'd want the 6th shelf eventually, so I have temporarily pinned it up with a super fancy binder clip... I know... really amazing right? Honestly, I think I could use the last shelf for Sunday morning church clothes, but then it starts getting down around his shoes...... so I"m thinking of just officially tacking up the  bottom shelf.

My mom is amazing and made the little hanging days of the week tags for me. I think she printed on the fabric with her printer (using the tutorial from the originally blog post, I think) and then she sewed them to the blue background. They are nice kinda thick, so they don't get bent up. 

I wasn't sure how I was going to attach them, but I finally just decided to take the old needle and thread and tack the corners. They are easily removable if I ever wanted to do something else with it (or possibly get the nicer hanging shelf and move the labels over to that one).

Anyway... it is great!!! So worth the effort! On Sunday, I just look at the weather report for the week and make sure he had the right clothes. I put everything in the cubbie for that day including socks and underwear. When the weather was nice and he was wearing shorts, I'd even put his sneakers in the Friday cubbie, so he'd remember he needed them for P.E. that day and couldn't wear sandals. He just gets up in the morning and puts on those clothes for the day. I don't have to worry about if he's matching, wearing something weather appropriate or if there are enough clean pants for the week... it's all done! Hooray!

Now... if I could just talk my husband into dropping him off at school in the morning, so I don't have to do it, my mornings would be about as good as they could get. =)


Thursday, June 12, 2014

Travel Pillow Project Completed!

A few weeks ago I found a tutorial for one of those travel pillows for kids. You know.. one of those ones that attaches to the seat belt, so their head doesn't dangle. I wasn't too sure about the safety of them, but then I realized there really isn't any pillow between the belt and the kid, so it's probably okay.

I took Malachi to JoAnn's to pick out his own fabric. He was on the search for monster truck fabric, but we came away with some Transformer's fabric. Good thing I had a 50% coupon because it was $9.99 a yard! (seriously??)

I spent the last couple days sewing it up from this tutorial over at Life Simplified. After I got past my irritating tension issues with my sewing machine, it went pretty quickly and I think it turned out pretty good!

I'm sure it will be great for our week-long camping trip next month. Probably not something I'll let him use in the car all the time, but will be great for longer trips when he usually falls asleep.

Now we just have to try it out!!

Sunday, April 27, 2014

Pinterest Clean-Up

I just spent a good deal of time cleaning up some of my Pinterest boards. Does anyone else have to do that occasionally? I spent the majority of my time today on a Party Time board that encompassed ALL types of parties: girl parties, kid parties, backyard parties, baby shower parties.... the list could go on and on...
What I discovered is that I had so many pins in there that I couldn't find what I was looking for (hmm... didn't I pin something one time for that??)

So today I split them into two categories: Kid Parties and Adult Parties. Hooray!
I also ended up deleting a bunch of pins that no longer apply, was something I decided I'd never do or I've done it and don't need the instructions anymore (I am now a tissue paper pom-pom expert thankyouverymuch).

I also found a bunch of diy furniture makeovers in a bunch of different catagories, so I combined them all onto one RePurposed Furniture board. Now I should just DO some of those projects. =)

I also seem to have a few too many "Misc" type boards. Those catch-all boards where you didn't know where to pin it, so you put it there. Hm... sometimes when I go through those boards I find a common thread and then *poof!* a new board is born. I even found this pin in one of those Misc boards today ---------> http://www.pinterest.com/pin/231653974555980115/ 

Ironic?


Thursday, July 11, 2013

More Outdoor Fun

This past Saturday, my husband was out of town and I decided the boys and I needed to do something fun. Another gal at work had asked me to switch weekends with her, so I ended up with a long stretch of days off - hooray!!

We had a busy few days: 
Thursday - the 4th of July. Spent with with my family. We went to my parents to light some little fireworks and have dinner and then headed out to the local fireworks show. Both boys LOVED it - even Zach! I wasn't sure how he'd do since it was SO long after bedtime, but he smiled and laughed through the whole show!

Friday - painting. My mom came over and we spent the day painting Zach's room a pretty sky blue.  It coordinates with a blue in the art work I bought WAY back at our last house. I'm finally getting around to putting a nursery together for him.... it's way past due. I am really happy with the result and I'll post some pictures when I get it all back together and art on the walls.

Saturday - the park! Somewhere along the way one of my summer goals was to visit a bunch of places we've never been (including me who has lived here my whole life!). So far this year we've visited the Mclane Creek Nature Trail and Nisqually Wildlife Reserve. I found an interesting looking place a little north of us in Tacoma for us to go this week. It was called the Tacoma Nature Center and it was sure fun!

The best part about this particular place was something called the Discovery Pond. It was basically a large playground. It was nice because it was enclosed but very spread out, so lots of kids could be there, but not on top of one another.
They also have nature trails with some nice loops - long and short. The 5 of us took one of the short loops and then later my Dad, Malachi and I took a longer trail, while my Mom stayed back with Zach while he napped. We had a picnic lunch at the Discovery Pond and it was a very fun day!
We've been blessed with some very nice weather around here lately. It's been warm and not much rain! Perfect for getting out and discovering new places!

Saturday, June 29, 2013

A Very Hungry Caterpillar Birthday

Months ago, I started planning a Very Hungry Caterpillar birthday party for Zach's 1st birthday. Little did I know how prophetic that choice was going to be. He really is like the Hungry Caterpillar in the way he eats. =)

My mom helped me out a ton with this party. It was meant to be fairly simple considering it's for a one-year-old, but it seems that even simple can be a lot of work. 

His shirt was just a white polo from Target with some felt circles sewn to it. I cut out the circles at work the night before (using my K-Cup as a guide!) and my mom sewed it together today before the party.

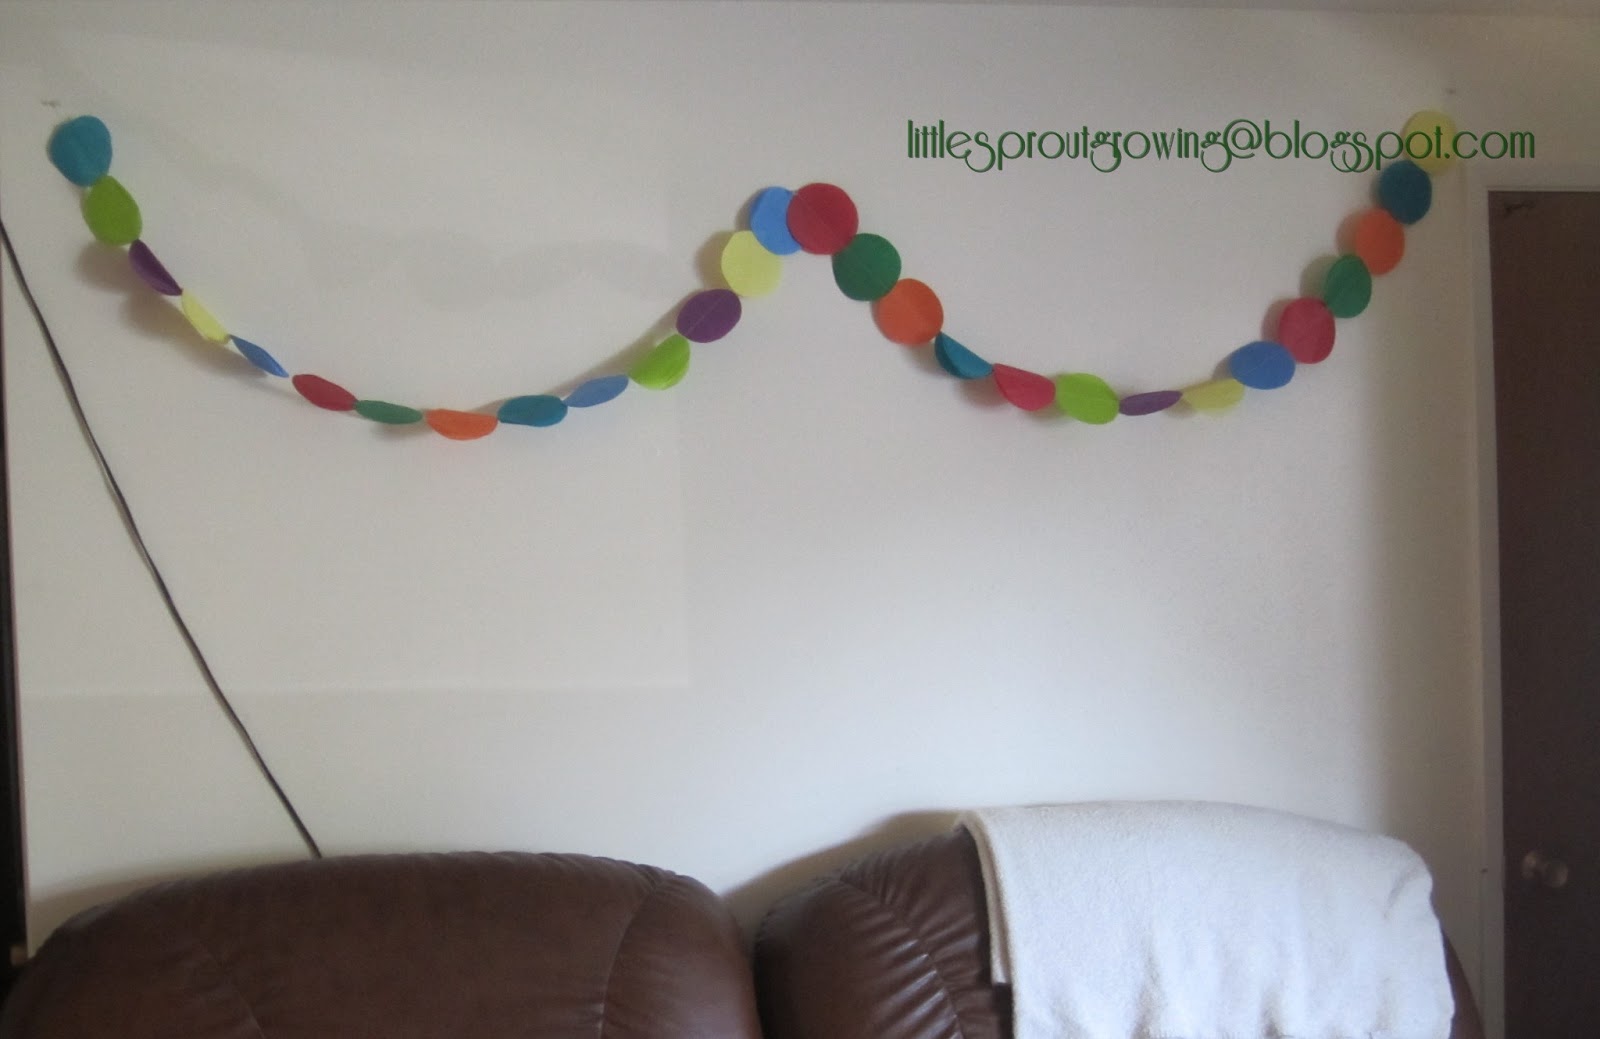
My mom made me this adorable tissue-paper garlands. I originally saw it done on another blog, but my moms followed the links to this DIY Tissue Garland. Seriously SO easy (or so it looked when she did it) and it added SO much to our decor. 

I had quite a few of these strung around the house: from the mantle, this one over the couch (on my currently bare wall), over the living room curtains and over the doorway in the dining room. Very colorful. I asked her to do the tissue circles double-layered. The blog I'd seen it on before only used a single layer of tissue and it was very transparent and I wanted a little more solid look.
I also put together a hanging caterpiller out of those tissue paper poms. There are a million tutorials out there, so I won't post one here. I just got red, light and dark green tissue and hung them from the ceiling with some fishing line. I had seen something like this made with hanging paper lanterns, but those things can be kinda expensive... so this was my alternative.

I was very excited about my food table. I researched lots of different parties and everyone had a cute idea. I finally decided on doing some simple foods and making cute little signs with wording from the book on them.

I got the graphics for the from Polka Dots and Puppies blog. (The link to her free printable is listed in the comments - FYI.) I made a little card for each thing for example: "On Saturday he ate through one PICKLE" or "In the light of the moon a little EGG lay on a LEAF". During the week, the caterpillar eats through a bunch of fruits and instead of having them each separate, I mixed them all up into a yummy fruit salad.
Our Hungry Caterpillar Food:
  • Small dill pickles
  • Mixed fruit salad (apples, pears, plums, strawberries and oranges)
  • Watermelon
  • Deviled eggs on lettuce leaves
  • Salami and Swiss cheese tray with butterfly crackers
For drinks we had iced tea and raspberry lemonade. I got these super cute mason jar lids for another party (which I have to blog about eventually) and had these red striped straws left over from my Red Hot Bunco party.

And lastly - but most importantly - the cake. I am so blessed to have a good friend who decorates cakes and she always makes my boys their birthday cakes and does an awesome job. This year was no exception with this adorable Hungry Caterpillar cake. Isn't he cute!?

So there it is... the Very Hungry Caterpillar Birthday Party. It was fun, simple and fairly cheap. Perfect for a little boy who won't remember it. =)


Wednesday, May 1, 2013

A New Big Boy Bed

It has been time to move Malachi out of his toddler bed for some time now. While cleaning out my grandma's house, my mom and I came across one of my uncle's old wooden twin frames. It needed some re-finishing, but it was perfect. 

When I got my supplies for painting my dining room table, I also picked up a quart of blue paint out of the "mistake" section at Lowe's. I was going to have them mix up a little sample jar of a navy blue paint, but then we came across this paint for $2.50! I just couldn't pass that up! I'll be able to paint the bed and probably his bookcase as well!

It's taken me some time to get around to actually finishing up the painting on the bed frame (I used the same method as the dining room table). Then it took my husband a few more days to get around to putting the bed together. Well... tonight we got inspired...

Malachi was in the playroom watching Cars 2. We put together the new bed, took the toddler bed out, re-arranged the whole room, switched out bookcases and made up the new bed. Then I got Malachi in the bath and dressed in the bathroom. We followed him into his room and he was so excited!! =) I've got to get him a comforter set or something to go with it. I had bought a construction-type sheet set on clearance at Target awhile ago, but these top blankets were just things a grabbed out of our linen closet.

Next on my project list will be to paint the new bookcase we put in his room. We had a tall and narrow thing that was holding his books before. It was leftover from something I'd had in my kitchen at one time. It wasn't really meant for books and many of them didn't even fit on it because the little cubbies were too small. I want to paint this new bookcase the same color as the bed - but here it is at the moment.

I can't believe my Little Guy is big enough for a Big Bed! 


Tuesday, April 23, 2013

DIY Chalk Paint - Dining Room Table Makeover

A few weeks ago a friend called to tell me about some new phenomenon called chalk paint. I'd never head of it (how I'd missed this on Pinterest, I don't know). Apparently it requires no sanding or prepping and can be used on most surfaces. I had a couple painting projects I was thinking of doing, so I thought I'd look into it. The only drawback.... it's super expensive - like $30 something a quart! I wasn't sure I thought it was quite THAT cool, but thought I'd look up some examples. 

Well, what do I find??? DIY versions of this awesome paint. I'm just going post a link to the one I found most helpful, Testing 1... 2... 3... Versions of Chalk Paint rather than go into much detail about the different kinds of recipes. (I used the non-sanded grout version)

So I gathered my supplies - which cost me about $20 total and will last me for MANY batches of this paint - and tried it out on my dining room table.

Now this table has been working fine for us for a few years now. It's something I picked up on Craigslist with 4 chairs for about $80. The legs and base are wood, but the top was a fake wood laminate stuff - which was not too attractive. I bought two of those little sample containers of paint at Lowe's for $2.98 each and mixed up my paint to try to remedy the table look. 

I painted the top a solid dark brown and the legs an off-white. I sanded down the legs for a slight distressed look, which Malachi was NOT impressed with. He was very upset that I "scratched" the table. I had to finish the project after bedtime - when the critic was asleep. =) Distressing the top wasn't really an option, since it wasn't wood underneath.
I think the laminate made the grittiness of the chalk paint more obvious. I don't know that I would use it again on a non-wood surface, but I really liked the result on the legs. I used about fifty layers of paste wax on the top and it's still not exactly how I'd like, but I attribute it to what I painted over. 

I have been informed by a friend who has now used both the Annie Sloan paint and the DIY version that the real stuff is thicker and apparently doesn't smell. Although, mine was so thick I had to add more water, so I think there is probably some variation in how it is mixed when you make your own. It's nice that you don't have to sand ahead of time, but if the choice was sanding or spending $30 on paint - I think I'd choose sanding.

Next up I have a headboard and footboard I need to re-finish for Malachi. I think we're going to work on that today! I'm excited to see how it turns out!


Monday, April 8, 2013

Currently:

I feel like this has been a very busy season for us. I've been having trouble finding the motivation to really blog. I feel guilty blogging during the day when the kiddos are awake and am tired in the evenings or am trying to spend some time with my hubby!

I DO have some things going on though that I'd love to blog about! If I can find the time!

  • Zachary's Hypothyroidism diagnosis
  • I'm planning a fun new DIY project with this interesting stuff->
  • I've been reading up on Montessori preschool ideas for Malachi. Some equipment projects may be in my future.....
  • My mom got me this nifty lid for my Homemade Coffee Creamer!


Friday, March 22, 2013

Dinosaur Birthday Party Prep

Tomorrow is our big Dinosaur Birthday Party! I've been busy running all over town to get all the necessary supplies and crafting away! I still feel like I have WAY too many things to do and I'm glad I took the day off work today or I'm sure I'd be stressing!!

Here is a little preview of what I've been up to:

Treat bags. I found these colored kraft bags at Michaels in our perfect party colors of orange and lime green. 
I've filled them with: Dino stickers, a dino egg with a dino tattoo inside, dinosaur fruit snacks, a bouncy ball and a green and orange Sixlets. 
Then I folded the tops over and tied them with some raffia I found from our Cowboy Party last year! Hooray for using stuff we already have! I also made some personalized name cards out of green and orange cardstock and printed with a Dinosaur font I downloaded.

Then I made up some little food signs including: Carnivore, Herbivore and Dessertivore. Along with a few specific foods.

And of course, there's a picture of my birthday boy!!


Tuesday, March 12, 2013

Red Hot Bunco Party

Last night I hosted a Red Hot Bunco party at my house. Last you saw me, I was in planning and painting mode! I got most of my painting done, the computer permanently moved out to the bonus room (from it's last home on the dining room table), and some new decor for the dining area. Hooray! I forgot to take photos last night, but here's the remaining of my decorations.


I collected a bunch of RED candies and placed them around the house in little bowls.
Sweedish Fish, Red Vines, cinnamon disks, strawberry hard candies, 
Hot Tamales, cinnamon bears, Boston Baked Beans....

I picked up the cute paper straws at a shop on Etsy and the table cloth was one that I got from my grandma's house!

I had a lot of fun making my decor! I was going for cheap, but fun.
I made a couple of these tissue paper poms and hung them from the ceiling with fishing line.
Isn't my coffee art cute?? I got those for $5 a piece at Big Lots.
I also made several of those polka-dot garlands and strung them around the house.

Red candles and some red tinsel that I put into glass containers around the house finished up the decor.

Other things for a Red Hot party?
We had these enchilada's. I just added some diced red tomatoes on top for a little color.
Red corn chips and salsa
Green salad with strawberries, cherry tomatoes and red raspberry vinaigrette dressing.
Cranberry/Raspberry Punch

Prizes included gift cards to Red Lobster, Red Robin and Target.


Monday, March 4, 2013

Homemade Vanilla Coffee Creamer

Ever read the ingredient list of your store bought coffee creamer?? I did one day. It contained a whole bunch of words that I could spell or pronounce. The only things I could recognise were water and sugar.... hmm....

I went on an internet search for DIY creamers. The first one I tried had you cooking milk, heavy cream and maple syrup together in a pot, adding a vanilla bean and then cooling. I wasn't really a fan.

I've made this next version a couple times now. I've made it with regular milk and with half-and-half. It's a little creamier with the half-and-half, but I think it works well either way.

Homemade Vanilla Coffee Creamer

Combine sweetened condensed milk and an equal amount of half-and-half using the sweetened condensed milk can as a measuring guide. Add approximately 2 Tablespoons of vanilla. Use the amount of vanilla that tastes good to you! Stir it up really good... the sweetened condensed milk sinks to the bottom. I pour mine into a mason jar (this makes it easy to stir up once in awhile!) I also write the expiration date of my half-and-half on the jar so that I know when it's time to replace the creamer (if there's any left!).

There you go! Super easy and good and you know what's in it!! AND as an added  bonus, no more plastic containers to recycle!


Saturday, December 15, 2012

A Homemade Christmas

In an effort to have a more cost-effective Christmas, I've opted to make many of our presents this year. Extended family members, gift exchanges and friends are receiving these gifts - although I think they are pretty great! I can't exactly say what these projects are because several people reading this blog might be receiving them.

My mom has come over two different days. One day we worked on sewing projects. We each had our own sewing project that we were working on, but it was way easier to do together (plus - she helped me a ton by cutting all mine out, so I could just focus on pinning and sewing!) This is super helpful to me because I don't get as distracted by the boys as I normally would by myself.


I'm have about half of this particular project done.

Today she came over again and we shopped and then assembled the other portion of our gifts. 


Mmmm... looks yummy right? These are about 1/2 done also. Now I have to finish them up and then find a way to wrap up these crazy gifts! Hmm....